Does anyone know the specs for the the following parts provided in the kits?
Solonoids
Screws - are they M3? (kit came with just a few mounting screws - a few short ones, 3 longer ones - we need to supplement)
Drawing templates for laser-cut parts… mostly it would expedite to know existing center-hole locations as a basis for inventing new mounts and laser-cutting custom shapes.
I thought (before purchasing) that I saw a this information online - open source ethic - but now I can’t seem to locate it. I could just be missing something.
I’d be happy to have the schemes of wooden parts as well if it’s okay with Johannes. I am afraid to break anything and was going to sketch their shapes and dimensions for 3d printing.
The solenoids are custom made in batches from 500pcs - the company does not sell less
The screws are M3
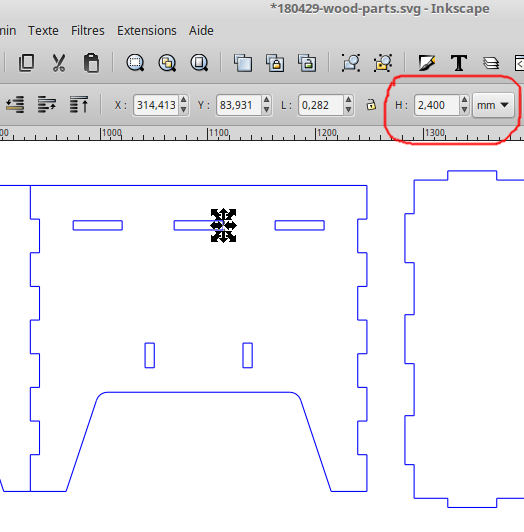
I will put the lasercut template on github. I already send it to some people before but did never get feedback if they where able to get good results when recutting them. Every laser usually needs some adjustment of dimensions to get best results.
Before making lots of parts, please make sure your settings for the laser cutter are right. The files for the production batch where quite different because another type of machine was used. The released files worked fine on the laser cutter available in the local fablab.
This is great! Thank you. Results were excellent. To compare prints with the provided parts I used Lego adapters to test the fit, and they were nearly identical.
I would recommend sequencing the laser to cut holes before outlines.
I have access to a laser cutter for a few weeks, and I would like to replicate the parts.
I have a stupid question : what is the thickness of the materials used ? It seems to me that it is 2,4mm for the wood, and I cannot define it for the acrylic parts. Maybe it does not matter for the acrylic parts ?
Has anyone tried fabricating the wood parts on acrylic? I’m looking to create a “touring” version of some of the mounts and would like them to be as robust as possible. @johannes any obvious obstacles I should think about before trying this?
@bdkauff my friends from joasihno did their mechanics with metal instead of wood for their touring setup. they recently made a streetmusic case which they first used at sxsw. there are some pictures here: https://www.facebook.com/pg/joasihno/photos/?ref=page_internal but not really large enough to see much.
Cool! Good to know that other materials are possible. I think I’ll try a batch swapping acrylic for wood and see if there are any issues. Thanks for the quick response, btw!
One other question @johannes : is there a good Google-able term for the mic stand part that comes with the kit? Not the wooden part, but the black plastic thing that threads into a mic stand.Thank you!
I would not suggest using acrylic. It is not really good to glue > only with special glue. And it breaks easier than the wood usually - but hat is only my experience.
I am using a special acrylic for the acrylic parts.
For the microphone adapter there is a certain size which works by default - sorry i don’t remember which size it was. But a microphone adapter like that in the right size just works for the solenoids coming with the kit: https://www.thomann.de/de/km_85055.htm Only needs some zip ties to hold stuff in place.